If you’ve ever opened the dryer, grabbed a warm towel, and thought, “Why is this still damp?” you’re in the right place. Almost every week, homeowners around Houston, The Woodlands, Spring, Tomball, Magnolia, and Conroe call us with the same complaint:
“My dryer machine is not drying like it used to. Do I need a new dryer?”
Sometimes the machine is the problem. But in our day-to-day work at Mighty Ducts of Texas, a huge number of “dryer not drying clothes well” calls are really vent issues hiding in the background, especially when the dryer vent runs up through the roof.
This article is our honest, from-the-field explanation of what’s usually going on. No risky roof tricks, just how we look at the situation when clothes won’t dry in the dryer, and you’re tired of running the same load three times.
When Your Dryer Slowly Stops Doing Its Job
The story usually starts quietly.
At first, the towels need “just ten more minutes.” A few weeks later, you’re running a second full cycle. Eventually, you’re standing in front of the machine thinking:
- “The dryer takes too long to dry now.”
- “The dryer is heating, but not drying the clothes all the way.”
- “My laundry dryer is not drying clothes unless I restart it.”
You might Google things like “dryer not drying properly”, while folding half-damp shirts on the bed. We hear these exact phrases when we arrive at a home.
From your side, it feels like the dryer just got lazy. From our side, it usually looks like a vent system that’s slowly been closing up for months.
It’s Usually an Airflow Problem, Not a “Bad” Dryer
A modern dryer is basically a big metal box with three key jobs:
- Warm the air
- Move that air through the clothes
- Push the moist air out through the vent to the outside
If step three doesn’t happen properly, you get the classic complaints:
- The dryer is not drying well
- The dryer is not drying clothes. The dryer is getting hot, but not drying.
The machine can still produce heat, so the drum feels warm, but the moisture has nowhere to go. The result? Heavy, steamy loads and a lot of frustration.
That’s why, when someone tells us their dryer won’t dry clothes, our first thought is not “new appliance.” Our first thought is “what’s going on in that vent?”
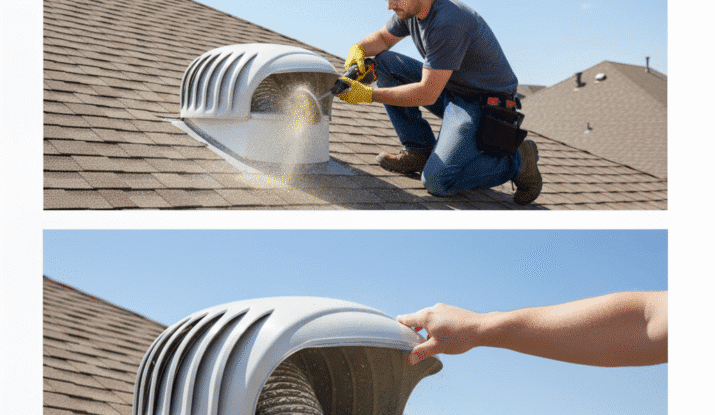
Why Roof-Exit Vents Are So Often the Culprit
In many two-story Texas homes, the builder ran the dryer vent up through the roof instead of straight out a side wall. On paper, it works. In real life, it creates a few headaches:
- The vent run is usually much longer than a simple wall exit.
- There are more elbows and bends where lint can grab on.
- The line often travels through hot attics before it reaches the roof cap.
- You can’t easily see the cap from the ground, so issues go unnoticed.
Over time, lint sticks to the inside of that long metal tunnel. The more you wash towels, hoodies, pet bedding, and kids’ clothes, the faster it builds.
We’ve opened roof caps where the passage was barely the size of a thumb. Inside the house, the owner knew the dryer did not dry clothes anymore and thought the unit was worn out. After we cleared the vent correctly and fixed a few problems, the same “old” dryer suddenly worked as it did years ago.
Red Flags You Can See Without Climbing on the Roof
You don’t need a ladder to know something’s off. Here are the signs we ask about when someone calls and says their dryer is not drying well.
- A normal mixed load needs two or more cycles
- The laundry room feels hot and humid after one load
- You smell a dusty or “hot lint” odour around the machine
- The top of the dryer feels hotter than usual
- You see lint collecting around the wall connection behind the dryer
- It’s been more than a year since anyone inspected or cleaned the vent
If a few of these sound familiar and your clothes dryer is not drying as it used to, there’s a good chance the vent, not the dryer, is your main problem.
What a Professional Visit Actually Looks Like (In Simple Terms)
We start with a conversation. We want to know how long the problem has been going on, how many cycles you’re running, and whether the issue is new or slowly getting worse. Those details help us decide where to look first.
We take a careful look at the setup: the dryer, the connector behind it, the wall port, and any visible sections of vent. We’re checking for obvious trouble like crushed or kinked connectors, the wrong materials, or visible lint escape.
If it’s a roof exit, we map out how that vent likely runs through your home. Sometimes we’ll check the attic or use tools to understand the length and number of bends. Then we use professional equipment designed to remove lint safely along the full path, not just shove it around.
Finally, we verify that airflow has improved and that the system is working the way it should. In many homes, the difference is huge: the next load that comes out of the dryer is fully dry after one normal cycle, and the dryer not drying saga is finally over.
Simple Things You Can Do Between Professional Cleanings
There are a few safe habits we encourage every homeowner to keep up with, nothing on the roof, nothing complicated:
- Clean the lint screen before every cycle. It takes seconds and really doesn’t matter.
- Don’t consistently overstuff the drum. Overloaded cycles make any dryer not drying properly feel even worse.
- Take a quick look behind the dryer now and then. If you see a badly kinked connector or heavy lint build-up, it’s worth a call.
These won’t fix a severely clogged roof vent by themselves, but they help your system breathe better between visits.
When Is It Time to Call Someone?

If you’re at the point where:
- The dryer is not drying well, even after cleaning the lint screen
- The clothes won’t dry in the dryer unless you keep restarting it
- You’re worried because the dryer will not dry a normal load in a single cycle
…then it’s probably time to stop guessing and let a team that does this all week take a look.
At Mighty Ducts of Texas, we work on roof-exit vents every single season. We know the local home styles, the usual vent layouts, and the specific headaches that come with long roof runs in our Texas heat.
When you reach out to us, you’re not just booking a cleaning. You’re getting:
- A clear explanation of why your dryer is not drying clothes well
- A safe, roof-appropriate solution so you’re not climbing ladders or juggling tools
- Honest feedback on your vent system and how often it should be maintained
If your dryer isn’t drying, or you’re simply tired of guessing, we’re here to help.
Give us a call, and let our team handle the roof, the vent, and the lint, so your dryer can go back to quietly doing its job in a single cycle.